Over the years, we found that a simple Image SEO optimization checklist can prevent many common mistakes and make a noticeable difference in both website performance and search rankings.
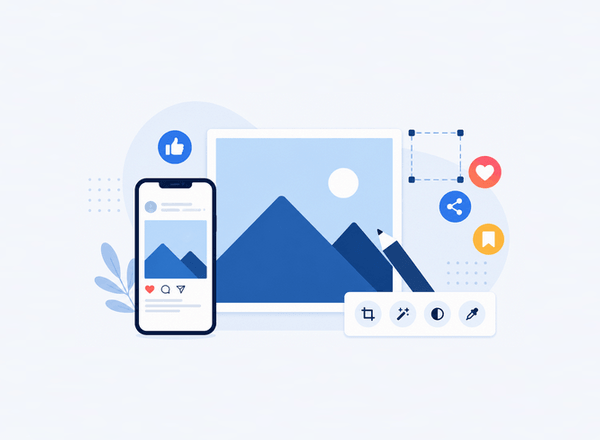
Images make websites more engaging, more attractive, and easier to understand. They break up long blocks of text, improve user experience, and help tell your story.
However, many WordPress site owners overlook one important fact: images can also impact your search engine rankings.
If your images are too large, poorly named, missing alt text, or not optimized correctly, they can slow down your website and hurt your SEO efforts.
The good news is that image SEO is not complicated. By following a simple image optimization checklist, you can improve page speed, boost accessibility, increase visibility in image search results, and create a better experience for visitors.
In this guide about our image optimization checklist, you will learn everything you need to know about image SEO for WordPress websites.
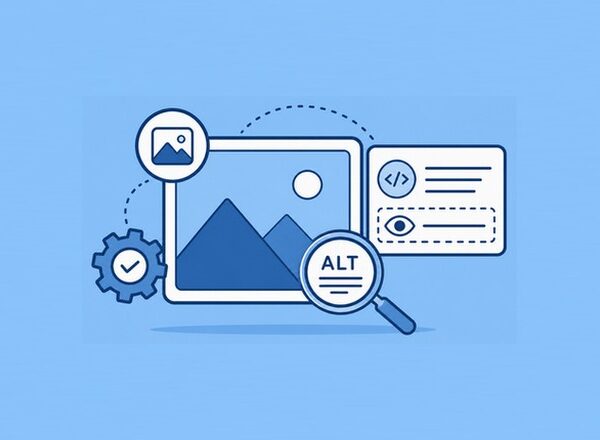
What Is Image SEO?

Image SEO is the process of optimizing images so search engines can understand them and users can load them quickly.
Search engines cannot “see” images the same way humans do. Instead, they rely on file names, alt text, surrounding content, image structure, and technical signals to understand what an image represents.
Proper image optimization helps:
- Improve page loading speed.
- Increase rankings in Google Images.
- Enhance accessibility.
- Reduce server bandwidth usage.
- Improve user engagement.
- Support overall SEO performance.
Think of image SEO as giving search engines clear instructions about every image on your website.
The Ultimate SEO Image Optimization Checklist for WordPress
Use Descriptive File Names
Before uploading an image, rename the file.
Many website owners upload images with default names generated by cameras, smartphones, or design software.
While this may seem harmless, generic file names provide little information to search engines and miss an opportunity to strengthen your image SEO.
A descriptive file name helps search engines understand the image content before they even analyze the page.
It also improves organization within your media library, making images easier to find and manage as your website grows.
Many cameras and smartphones generate names like:
- IMG_4821.jpg
- DSC00389.png
- Screenshot001.webp
These names provide no useful information to search engines.
Instead, use descriptive keywords that accurately describe the image.
- Good Example: wordpress-image-seo-checklist.jpg
- Bad Example: IMG_4821.jpg
Keep file names:
- Short.
- Relevant.
- Easy to read.
- Separated with hyphens.
This simple step gives search engines valuable context.
Compress Images Before Uploading

Large image files are one of the biggest causes of slow-loading websites.
Beautiful blog images that take several seconds to load can hurt both user experience and SEO performance.
Before uploading images to WordPress, reduce their file size using image optimization tools.
Uncompressed images use more bandwidth and increase page load times, especially for mobile visitors. Image compression can often reduce file sizes significantly with little or no noticeable loss in quality.
Smaller images load faster, improve Core Web Vitals, and help create a better experience for both users and search engines.
Compressing images should be one of the priorities in any image optimization checklist, as it directly affects website speed and performance.
Popular tools include:
Tools such as TinyPNG can help website owners reduce image sizes while maintaining visual quality, making image optimization faster and easier.
Benefits of compression:
- Faster page speed.
- Lower bandwidth usage.
- Better Core Web Vitals scores.
- Improved mobile experience.
Choose the Right Image Format
Not all image formats serve the same purpose.
Choosing the correct format can significantly affect image quality, file size, and page loading speed. Using an unsuitable format may result in unnecessarily large files or reduced visual quality.
Selecting the proper file format is an important step in a comprehensive image optimization checklist and can make a noticeable difference in overall performance.
Different formats are designed for different use cases, so understanding their strengths can help you make better optimization decisions.
JPEG:
Best for:
- Photographs.
- Blog images.
- Product images.
Advantages: Small file size and wide compatibility.
PNG:
Best for:
- Logos.
- Transparent backgrounds.
- Graphics.
Advantages: High quality and supports transparency.
WebP:
Best for:
- Most modern websites.
Advantages: Smaller file sizes than JPEG and PNG and excellent image quality.
AVIF:
Best for:
- Maximum compression.
- Modern browsers.
Advantages: Extremely efficient and outstanding quality-to-size ratio.
For most WordPress websites, WebP is an excellent choice.
Add Meaningful Alt Text
Alt text (alternative text) helps search engines and screen readers understand images.
It also improves accessibility for visitors with visual impairments.
When an image cannot load properly, the alt text provides a description of what should appear on the page. This helps users understand the content even if the image is unavailable.
Well-written alt text also gives search engines additional context, which can improve your chances of appearing in image search results.
Keep alt text clear, descriptive, and relevant to the image. Focus on accurately describing what the image shows rather than stuffing it with keywords.
Example:
Image: A person optimizing images in WordPress
Alt text:
“Person optimizing website images in WordPress dashboard.”
Avoid:
- Keyword stuffing.
- Generic phrases like “image” or “photo”.
Write naturally and describe what users actually see.
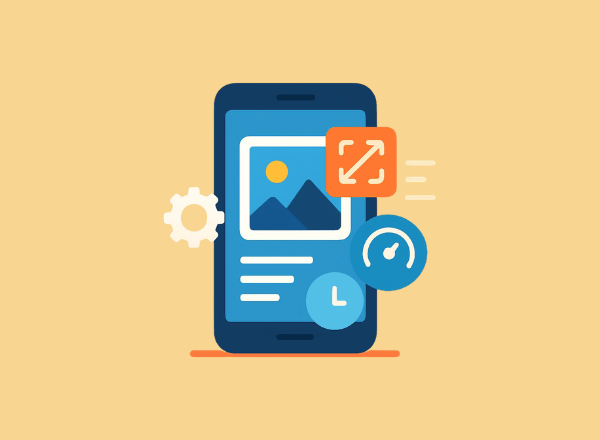
Resize Images to Match Display Dimensions

Uploading a 4000-pixel-wide image and displaying it at 800 pixels wastes resources.
WordPress automatically creates multiple image sizes, but starting with appropriately sized images is still important.
Oversized images increase file sizes and force browsers to download more data than necessary.
This can slow down page loading times and negatively impact the experience for visitors, especially those using mobile devices or slower internet connections.
By resizing images before uploading them, you reduce unnecessary bandwidth usage and improve website performance.
As a bonus, smaller image files take up less storage space, helping keep your WordPress media library organized and efficient.
As a general guideline:
- Blog images: 1200–1600px wide.
- Featured images: 1200–1920px wide.
- Thumbnails: 300–600px wide.
Smaller dimensions typically result in faster loading pages.
Enable Lazy Loading
Lazy loading delays image loading until visitors scroll near them.
Instead of loading every image immediately, the browser loads only images that are visible on screen.
This reduces the amount of data that must be loaded when a page first opens, resulting in faster initial load times and a smoother browsing experience.
Lazy loading is particularly beneficial for long articles, image galleries, and pages containing multiple visuals.
By loading images only when needed, you can reduce bandwidth usage, improve page speed scores, and help visitors access your content more quickly.
Modern versions of WordPress include built-in lazy loading support, making it an easy optimization to implement.
Benefits include:
- Faster initial page load.
- Better mobile performance.
- Reduced bandwidth usage.
Modern versions of WordPress include native lazy loading support, making this optimization simple to implement.
Create Image Sitemaps
An image sitemap helps search engines discover and index images more efficiently.
Many SEO plugins automatically generate image sitemaps, including:
Without an image sitemap, search engines may overlook some images, particularly those loaded dynamically or embedded deep within your website.
An image sitemap provides additional information about your visual content, making it easier for search engines to find and understand your images.
This can increase the chances of your images appearing in Google Images and other visual search results.
For websites that rely heavily on images, such as e-commerce stores, photography portfolios, travel blogs, and recipe sites, image sitemaps can provide an additional SEO advantage.
An image sitemap is also an important part of any image optimization checklist.
Optimize Captions When Relevant
Captions are among the most-read elements on many web pages.
If a caption adds value to the reader, include one.
For example:
“Image showing a 75% reduction in file size after optimization.”
Captions provide additional context for users and search engines.
They can help explain the purpose of an image, highlight important details, or reinforce key points discussed in the surrounding content.
Well-written captions also encourage visitors to spend more time engaging with your page, which can improve the overall user experience.
While not every image requires a caption, adding them to charts, screenshots, infographics, and educational visuals can make your content more informative and easier to understand.
Use Responsive Images
People visit websites using:
- Smartphones.
- Tablets.
- Laptops.
- Large desktop monitors.
Responsive images ensure the correct image size loads based on the visitor’s device.
WordPress supports responsive images automatically through the srcset attribute.
This helps:
- Improve loading speed.
- Reduce data usage.
- Enhance mobile performance.
Without responsive images, mobile users may be forced to download large desktop-sized images, which can slow down page loading times and consume unnecessary bandwidth.
By serving appropriately sized images for each screen size, your website can deliver a faster and more efficient experience across all devices.
Ensuring images display correctly on every screen should be a standard part of any image optimization checklist.
Responsive images also help improve user satisfaction by ensuring visuals look sharp and properly scaled, regardless of screen size.
As mobile traffic continues to grow, optimizing images for multiple devices has become an essential part of modern image SEO.
Improve Core Web Vitals

Google uses Core Web Vitals as part of its page experience signals.
Images often play a major role in these metrics. Poorly optimized images can slow down loading times, create layout issues, and negatively affect the overall user experience.
By optimizing your images, you can improve performance metrics and create a smoother browsing experience for visitors. Monitoring Core Web Vitals should be a priority in every image optimization checklist.
Focus on:
Largest Contentful Paint (LCP): Large hero images frequently affect LCP scores.
Optimize:
- Hero images
- Featured images
- Homepage banners
These are often the largest visual elements on a page and are typically the first images visitors see. Compressing and properly sizing these images can significantly improve loading performance.
Cumulative Layout Shift (CLS): Always define image dimensions. This prevents content from shifting unexpectedly during loading.
Unexpected layout shifts can frustrate users, especially when they are trying to read content or click buttons. Setting width and height attributes helps browsers reserve the correct amount of space before images load.
Interaction to Next Paint (INP): Reduce heavy image-related scripts and unnecessary processing that may slow down page responsiveness.
A fast-loading page is important, but visitors also expect a website to respond quickly to their actions. Keeping image optimization processes efficient helps ensure smooth interactions across desktop and mobile devices.
Use an Image Optimization Plugin
Manually optimizing every image can become time-consuming.
A good WordPress plugin can automate much of the process.
Popular options include:
These plugins can automatically compress images during upload, convert files to modern formats like WebP, and optimize images already stored in your media library.
This helps ensure that every image on your website follows optimization best practices without requiring manual work for each upload.
For websites that publish content regularly, image optimization plugins can save significant time while maintaining consistent performance across the entire site.
Many plugins also provide bulk optimization features, making it easy to improve older images and boost overall website speed. A reliable plugin can simplify many tasks included in an image optimization checklist.
Automation saves time and ensures consistency.
Optimize Images for Social Sharing
When users share your content on social media, images often determine how attractive the post appears.
Configure Open Graph images using SEO plugins.
Recommended size:
1200 × 630 pixels
This helps your content look professional on:
A properly optimized social sharing image can increase visibility and encourage more clicks when your content appears in social feeds.
Large, high-quality images are more likely to grab attention and make your posts stand out among competing content.
Using a dedicated Open Graph image also gives you more control over how your content is presented when shared.
Instead of relying on a random image from the page, you can choose a visual that best represents the article and encourages engagement.
This simple optimization can improve both brand consistency and click-through rates from social media platforms.
Monitor Performance Regularly

Image SEO is not a one-time task.
As new content is added, image issues can reappear.
Regularly test your website using:
Review:
- Large image files.
- Missing alt text.
- Slow-loading pages.
- Mobile performance.
Regular monitoring helps you identify problems before they affect user experience or search rankings. Even well-optimized websites can develop performance issues over time as new images, plugins, and content are added.
By performing routine audits, you can catch oversized images, broken image links, and other optimization opportunities early.
A proactive approach helps keep your WordPress site fast, efficient, and aligned with current SEO best practices. Regular audits are an essential part of any image optimization checklist.
Common Image SEO Mistakes to Avoid
Many website owners accidentally harm performance through simple mistakes.
Avoid these common issues:
- Uploading images directly from a camera.
- Using generic file names.
- Skipping alt text.
- Choosing PNG for every image.
- Ignoring mobile optimization.
- Uploading oversized images.
- Forgetting image compression.
- Not testing page speed.
Modern cameras and smartphones often produce extremely large image files that are far bigger than most websites need.
Uploading these images without resizing or compressing them can significantly increase page load times and consume unnecessary bandwidth.
While each mistake may seem minor on its own, the combined impact can slow down your website and create a poor user experience.
Taking a few extra minutes to optimize images before publishing can prevent many of these common issues and help maintain strong SEO performance.
Following a structured image optimization checklist can help you avoid these mistakes and maintain consistent optimization standards.
Quick SEO Image Optimization Checklist
Before publishing any new content, verify the following:
- File name includes descriptive keywords.
- Image compressed.
- Correct file format selected.
- Alt text added.
- Dimensions optimized.
- Responsive image enabled.
- Lazy loading active.
- Captions added when useful.
- Social sharing image configured.
- Performance tested.
This image optimization checklist covers the most important steps required to optimize images for speed, accessibility, and search visibility.
Taking a few moments to review this image optimization checklist can help prevent common image SEO mistakes before they affect your website.
Making these checks part of your publishing workflow ensures that every new image contributes to better performance, improved accessibility, and stronger search visibility.
Over time, these small optimization habits can have a significant impact on page speed, user experience, and overall SEO results.
Consistency is often the key difference between a well-optimized website and one that struggles with performance issues.
Final Thoughts
Image SEO is one of the most overlooked opportunities in WordPress optimization. Many website owners spend hours improving content and building backlinks while ignoring images that quietly slow down their pages.
The good news is that most image SEO improvements are easy to implement. A few minutes spent compressing images, writing better alt text, choosing modern formats, and optimizing dimensions can have a significant impact on page speed and search visibility.
If you use WordPress, make image optimization part of your publishing workflow. Tools such as PixWizify and image optimization plugins can simplify the process and help keep your website fast, efficient, and search engine-friendly.
Small improvements made consistently often lead to the biggest long-term results. Do you have more suggestions or tips we can include in our SEO image optimization checklist? Just drop a comment below.